How to Add Blur Gradients to Art in Medibang
"Blur" can be used to create a sense of perspective.
This can not merely ameliorate backgrounds and foregrounds, simply also small parts of a drawing such every bit hair or trunk parts.
Among such mistiness functions, this time I would like to show yous how to do it when you want to blur just a part of the image.
i. Why does blurring requite a sense of perspective?
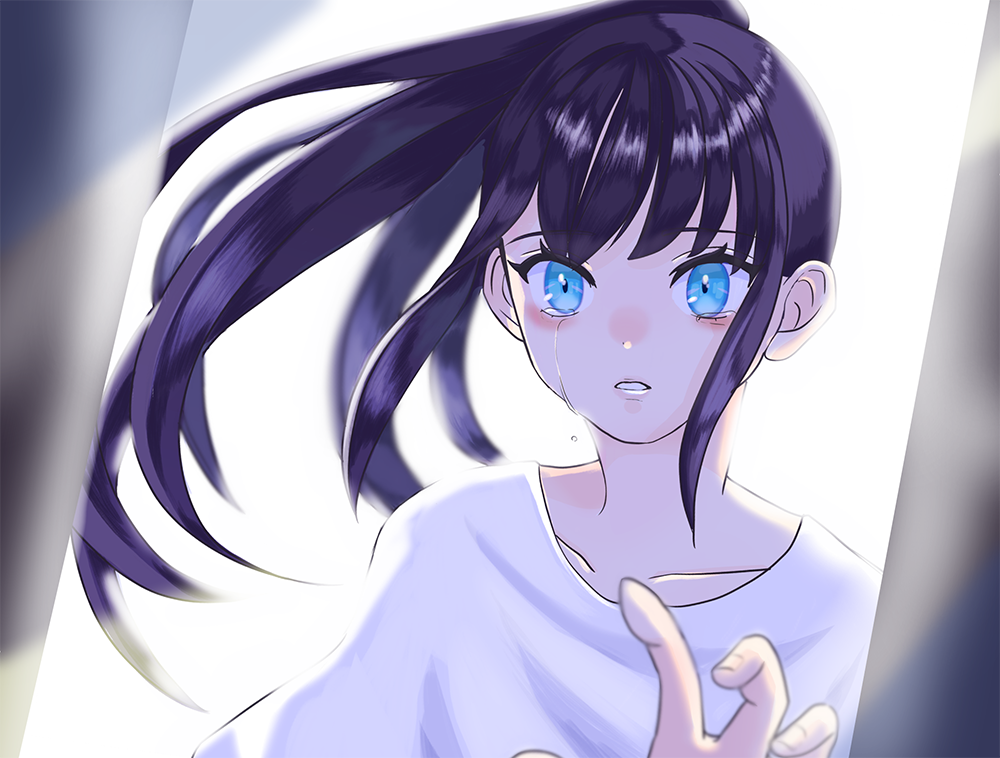
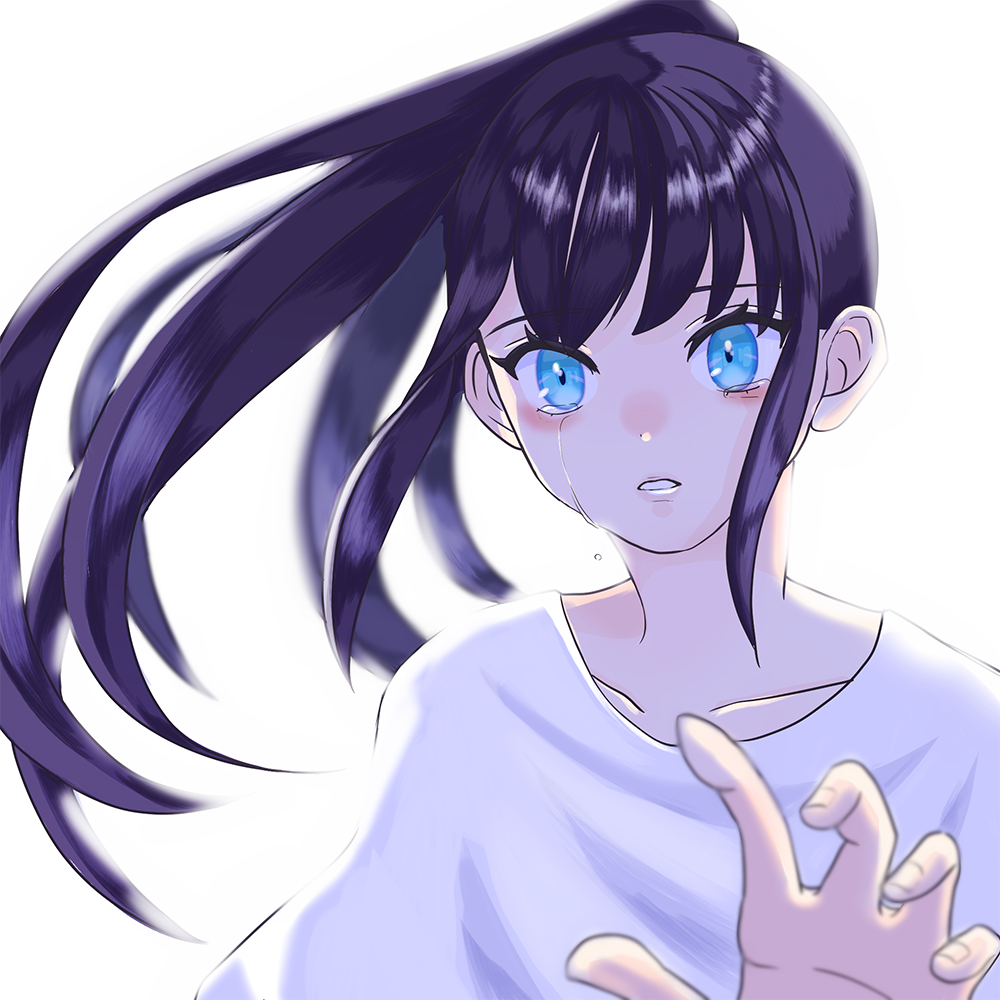
First, permit's run across what information technology looks like when you lot blur just part of the illustration.
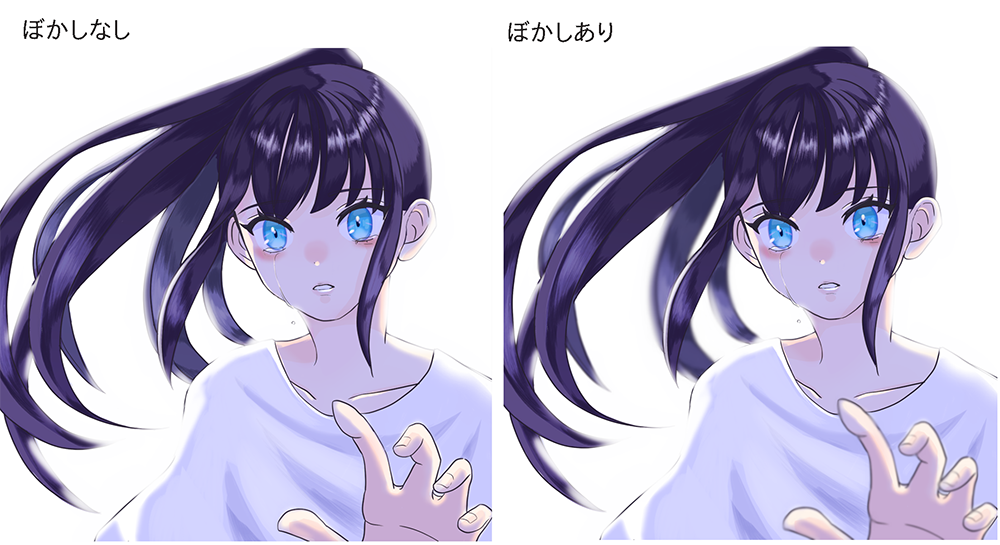
I blurred the hair backside her body and her hands, which is where I want people to run across the about.
I recollect the blurred prototype gives a little more than perspective than the unblurred ane.
Partially blurring a drawing is like shooting fish in a barrel,
① Utilise the blur castor.
② Utilise Selection + Gaussian Blur
③ Separate the area you want to mistiness into layers and use Gaussian blur.
In that location are three ways to do this.
In this commodity, we volition take a await at the easiest manner to blur a part of the image using the mistiness brush.
two. Let's use the blur brush to blur a part of the illustration
Now, let's really blur a function of the illustration using the brush.
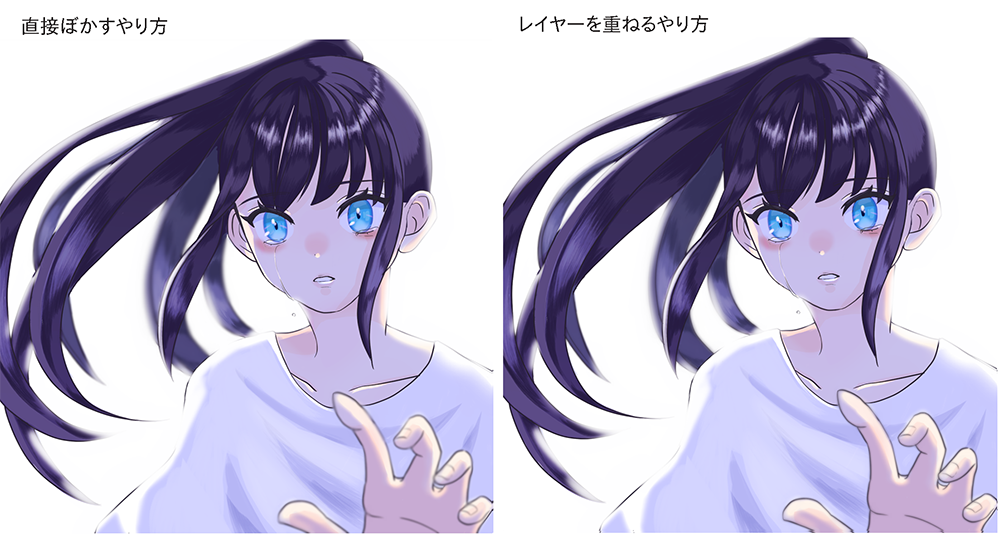
2-1. How to mistiness an illustration directly
① Merge all the layers of the illustration you want to blur.
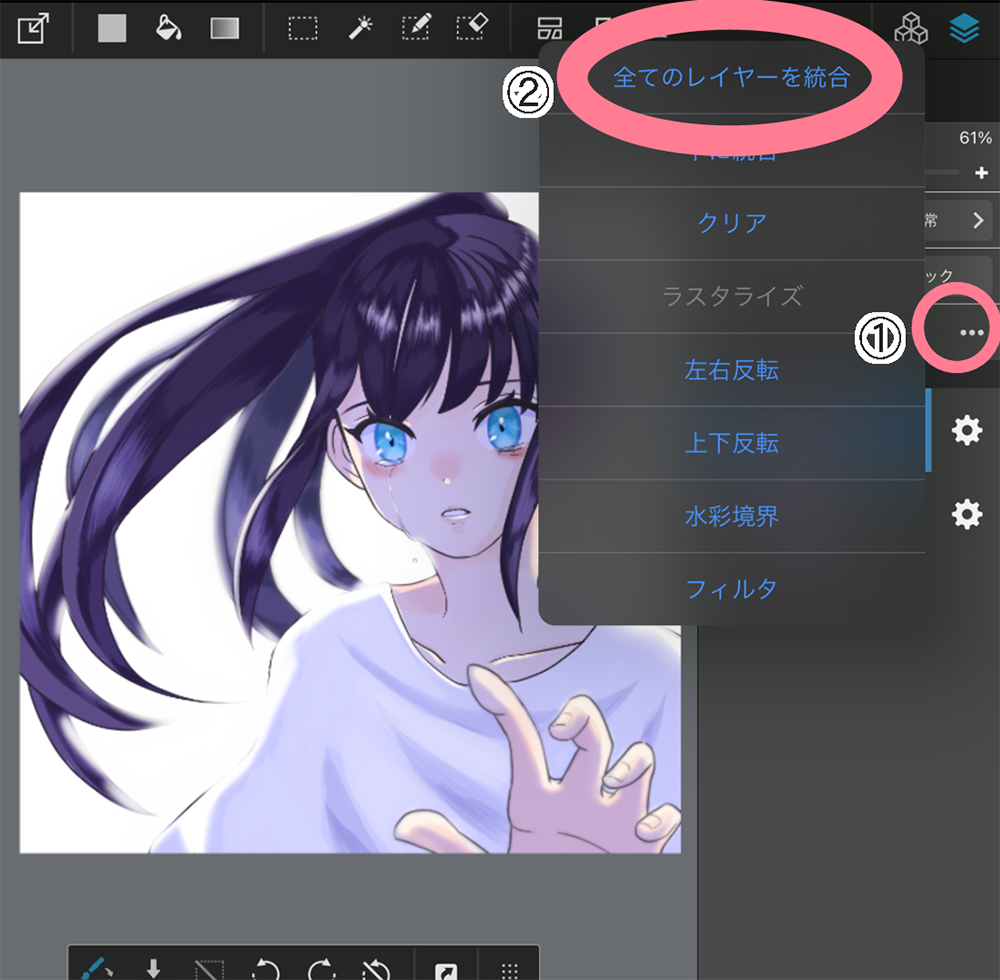
To blur line drawings and paint all at one time, first merge the layers.
[OnePoint]
If yous save the file later merging the layers, you will not be able to undo your changes when y'all desire to showtime over, and then I recommend duplicating the entire file offset.
② Blur the merged layer directly with the blur brush.
In one case y'all have merged the layers, you can directly blur them with the blur castor.
At this betoken, we need to pay attention to the degree of blur.
The farther the focus is away from the person, the stronger the blur will exist.
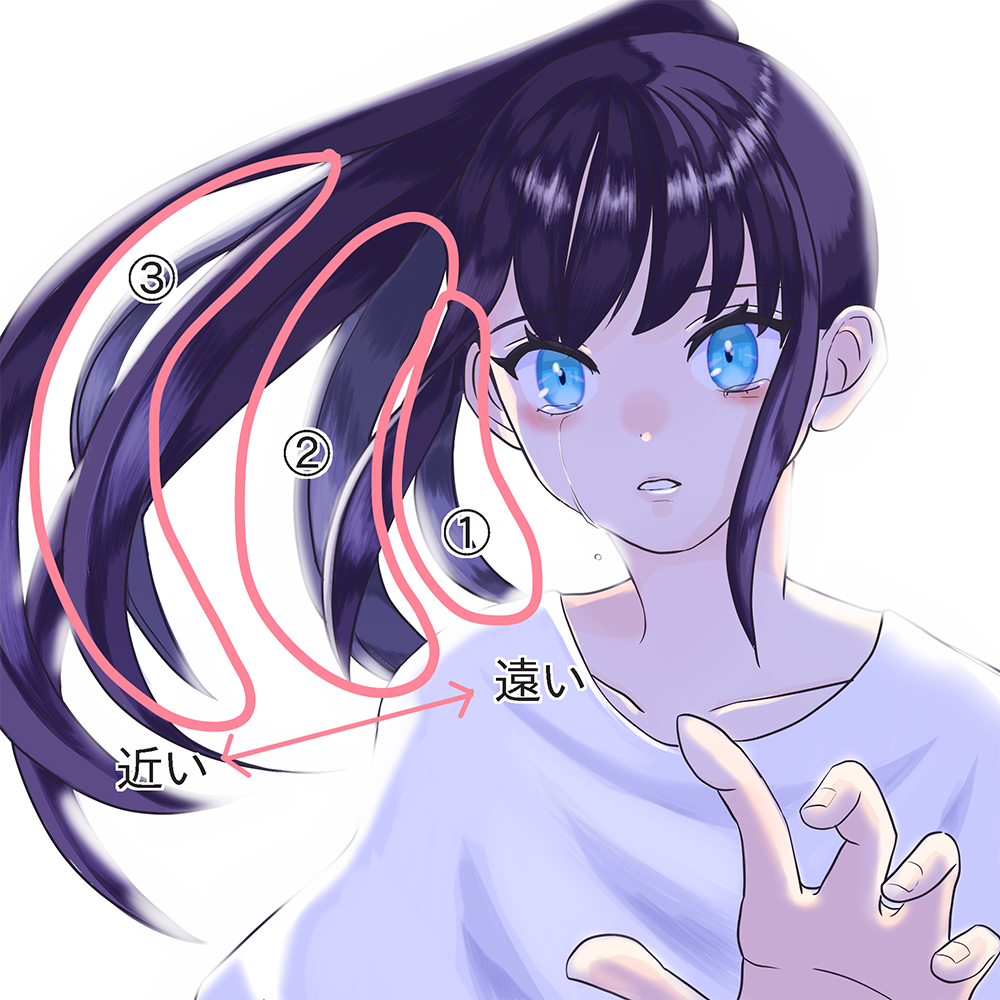
In this case, the hair in ① is the farthest away, and then information technology is blurred the most strongly, and the blur in ② and ③ is loosened piddling by lilliputian.
[How to adjust the blur level]
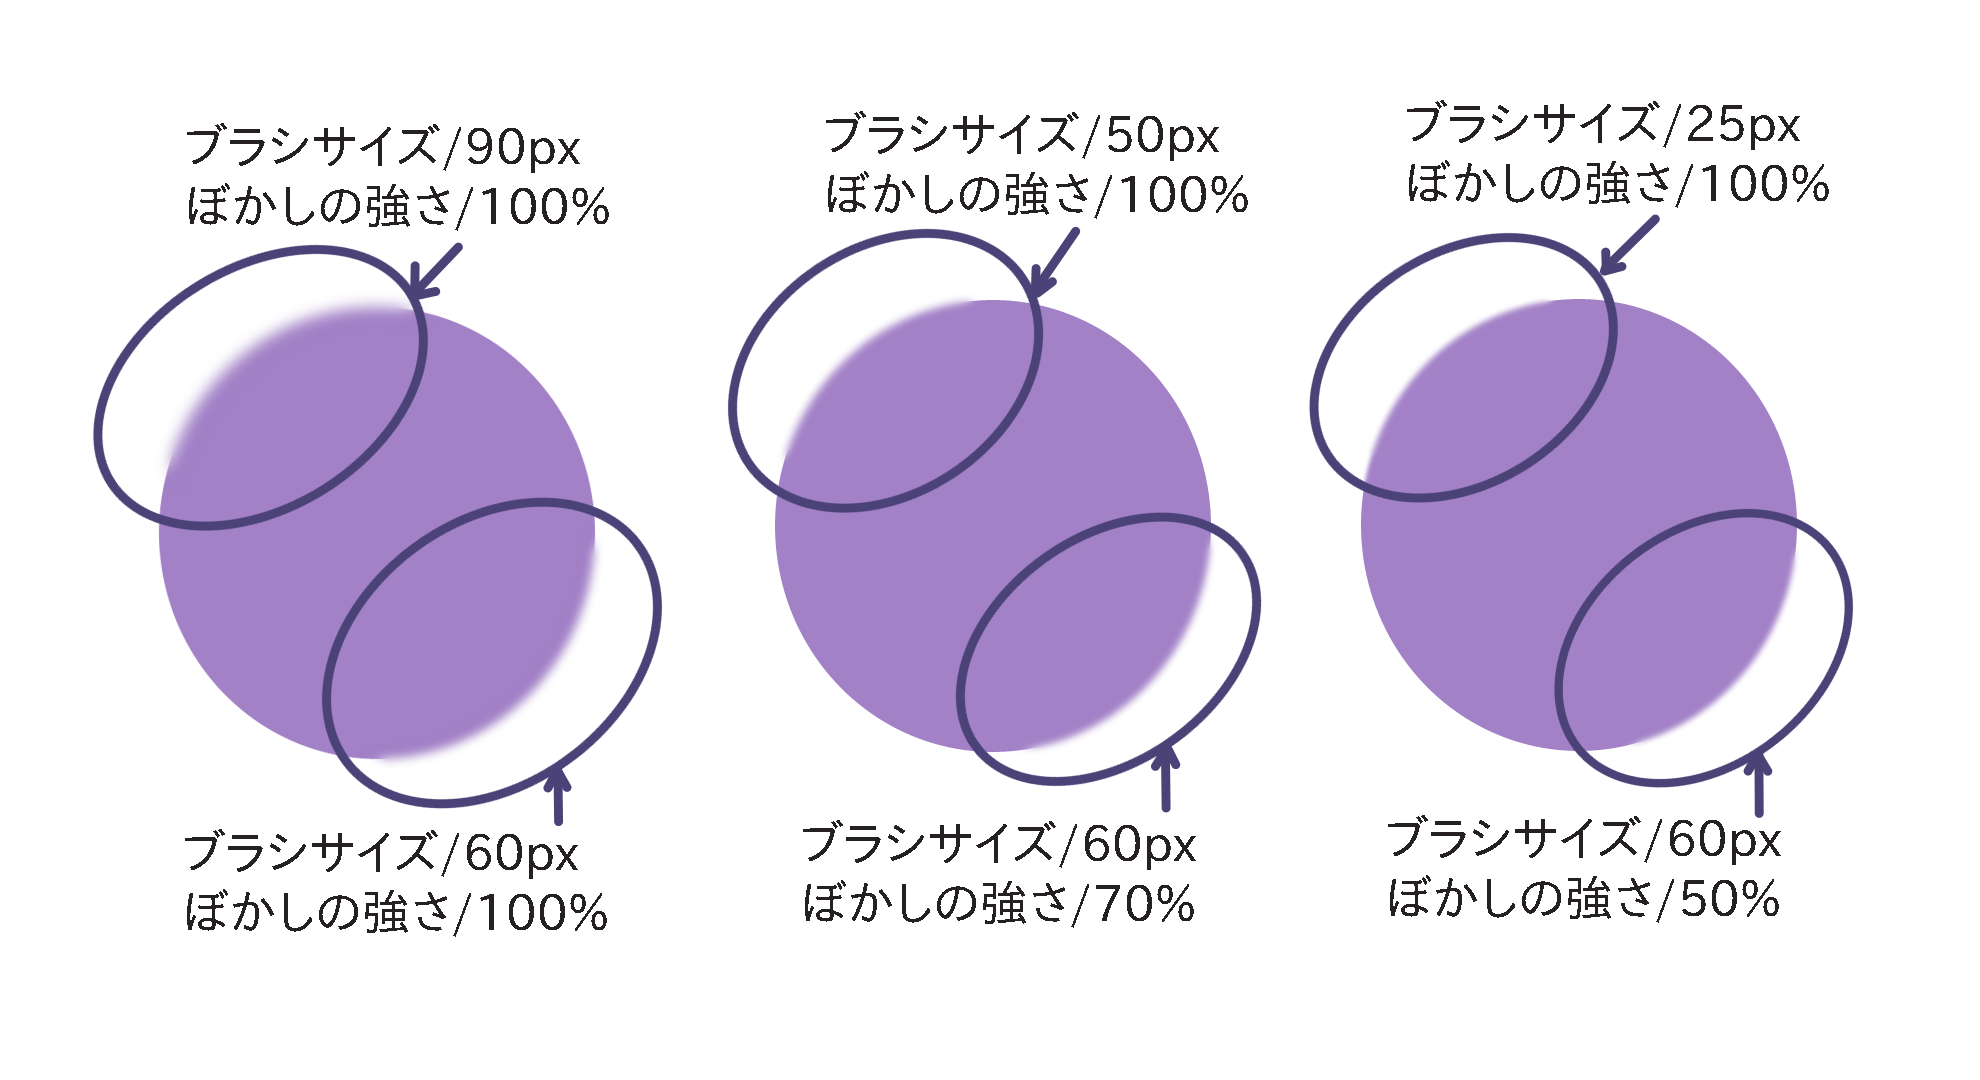
The blur level can be adapted in the "Mistiness" section of the brush settings.
The blur is strongest at 100%, and the smaller the value, the smaller the blur.
If you lot increment the brush size, you can mistiness the image more widely, making the mistiness look stronger.
ii-2. Duplicate and overlay the illustration
In improver to directly blurring the illustration as described above, you can also duplicate the layer, blur it, and and then overlay information technology with reduced opacity.
① Merge all layers.
Nosotros will merge all the layers hither like in the previous step.
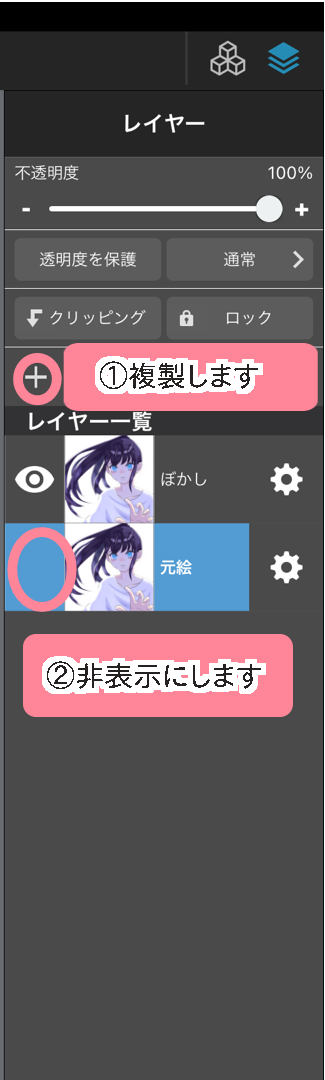
② Duplicate the merged layers.
Duplicate the layer you but merged and hide the layer below it.
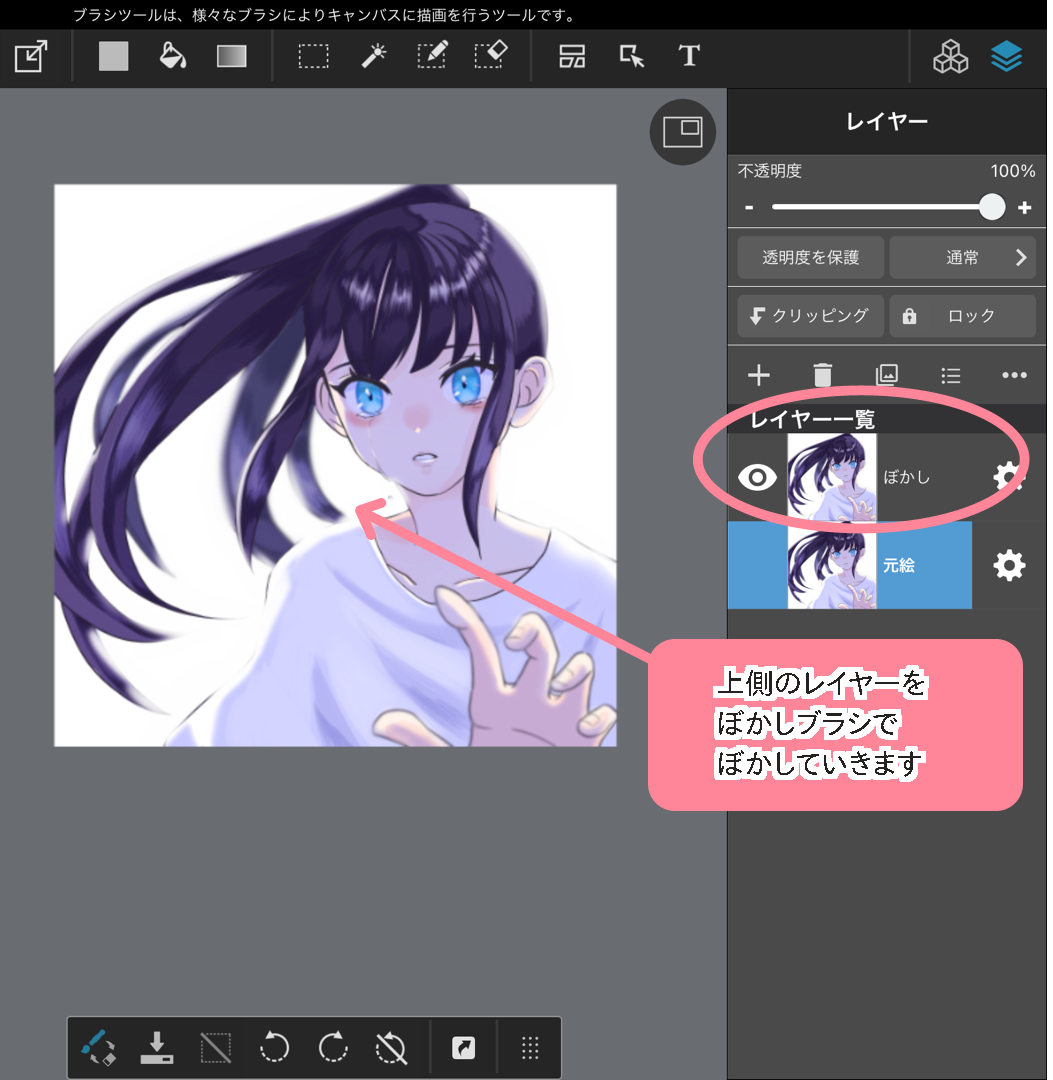
③ Mistiness the upper layer.
Utilise the blur brush to blur the upper layer.
Information technology is OK to utilise a stronger mistiness hither.
④ Lower the opacity.
Display the lower layer and subtract the opacity of the upper layer to accommodate the blur.
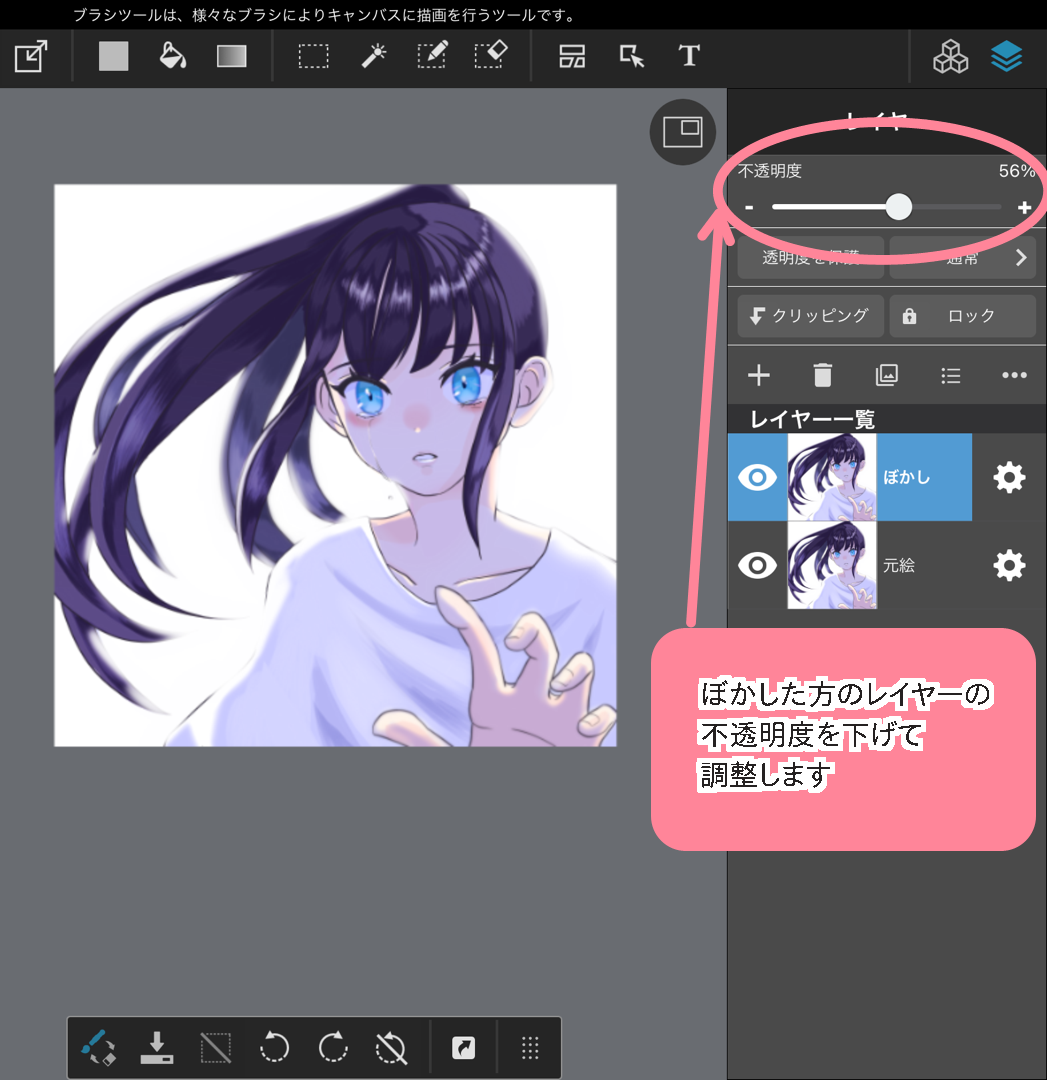
The difference between this method and the previous one is that this method leaves some of the lines of the underlying picture intact, which makes it easier to avert over-blurring. The choice of which method to utilise depends on your preference, then endeavour the method that suits y'all best.
3. Good points of the blur brush and notes on using it
three-1. What I like nearly the Blur Brush
The all-time thing about the mistiness castor is that you can mistiness as if you were applying color directly, so information technology is piece of cake to blur as you imagine.
You tin likewise suit the mistiness level freely in the brush settings, and so y'all tin easily blur the image when you want to express a sense of perspective in different stages, as described earlier.
※You tin can also exercise Gaussian blur by selecting individually, but y'all will demand to repeat the process of selecting ① then blur, selecting ② then blur, and so on.
three-2. Points to note when using the blur castor
One affair to think when using the blur brush is that you need to undo to restart.
It is non possible to erase only the mistiness with an eraser or a transparent brush, so if the blur surface area is also large or the blur is in the wrong place, click undo to redo it.
If yous want to blur an illustration direct, duplicate the file then you can start over from the offset.
(Text and pictures by Sakaki)
Source: https://medibangpaint.com/en/use/2021/08/how-to-use-the-blur-brush/
0 Response to "How to Add Blur Gradients to Art in Medibang"
Post a Comment